Schedule emails in Outlook
Scheduling emails to send later is a great feature introduced
by Microsoft. Applying this feature, the any of the user can achieve the
perfect timing on sending the email. In the day-to-day busy schedule setting up
schedule emails will keep you out of trouble. But remember that the schedule
email is be send based on your time zone. Below are the steps on how to send
schedule email.
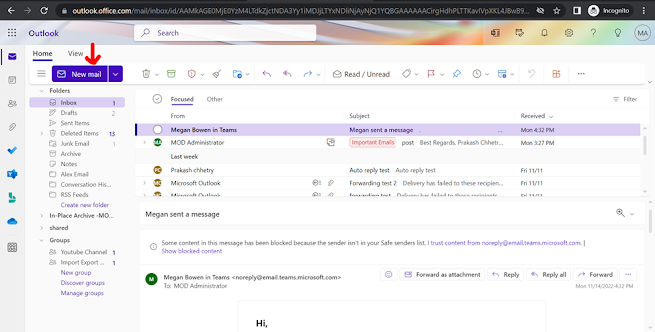
On your Outlook create a new email message by clicking on “New
mail”
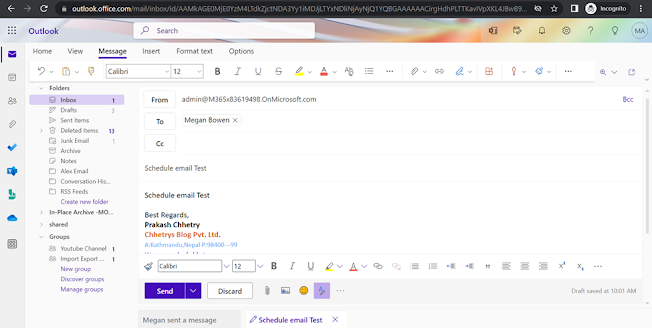
Enter the recipient address, compose your email.
On the side of “Send” button you will see the drop-down
option. On clicking you will see schedule send option available. Click on it.
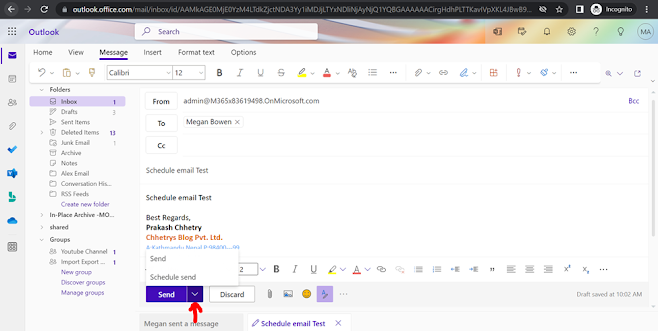
If you have already performed another Scheduled task, then
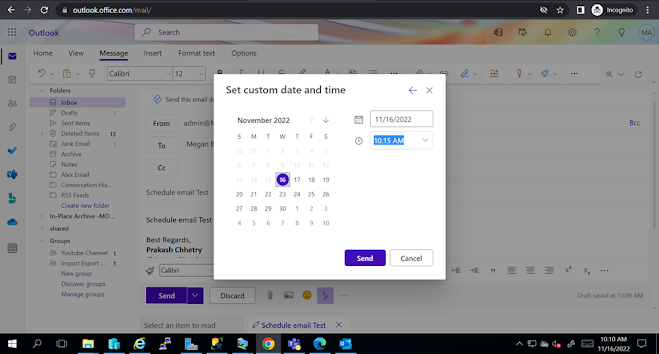
it will show up as last chosen time. You can choose the available time or customize
the time as per your requirement.
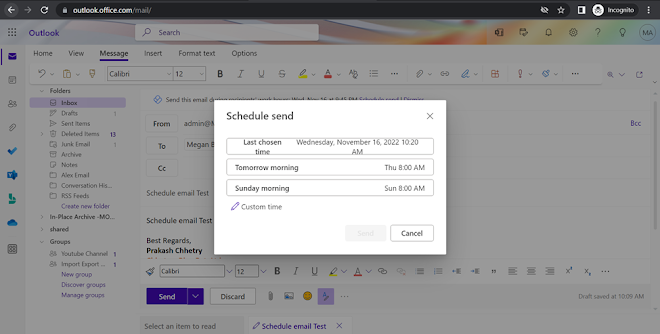
Select the date and time and click on send.
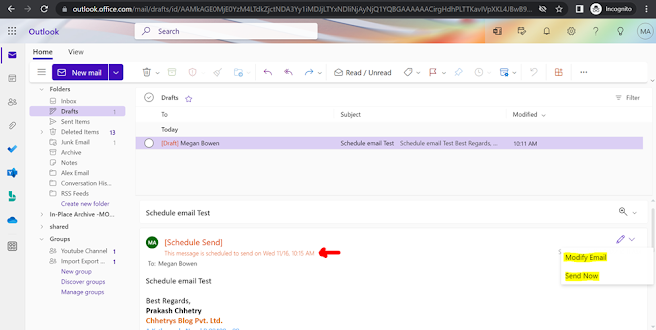
After you click on “Send”, the email will be saved as draft.

The message is scheduled to send on the configured time. You
can also modify or send instantly if needed.
After the configured time matches to your time zone, the email will be sent.
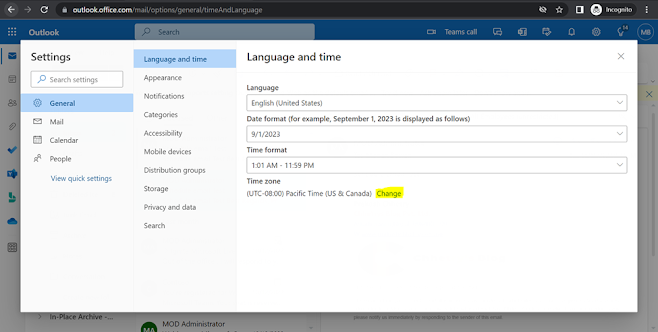
Note: Check your time
zone before setting up the email. To know more about changing the time zone: OutlookTraining Day 5- Change the time Zone in outlook.
Checking on the Megan’s email it is seen that the email is
received on 8:31 PM although it was sent on 10:15 AM. This is because of the
time-zone set on Megan’s account.

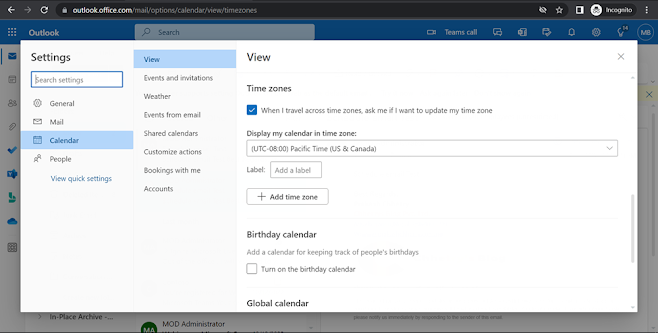
Let’s change the time-zone and check the result. Go to settings, click on view all outlook settings. You will see the time zone option available on the general tab, on time zone click on change.
To know more about changing the time zone: Outlook Training
Day 5- Change the time Zone in outlook.
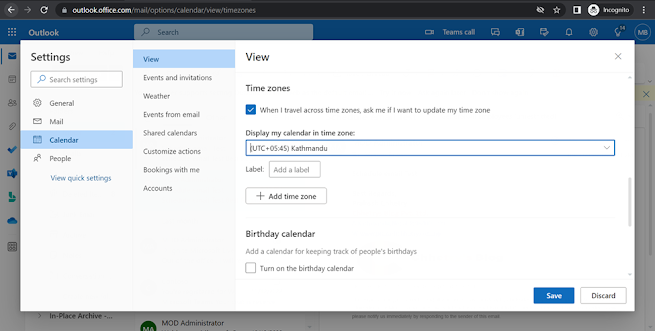
Search the time-zone that matches your current zone.
After the addition of the time-zone click on save.
Now, click on Update
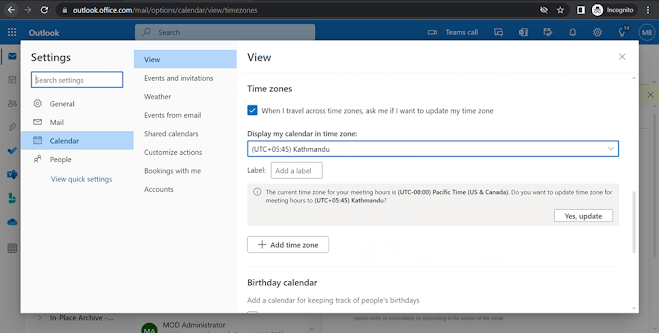
Now, when you see the time as per the configuration