
1.Device is ready

2.Go to Terminal

3.Update the server
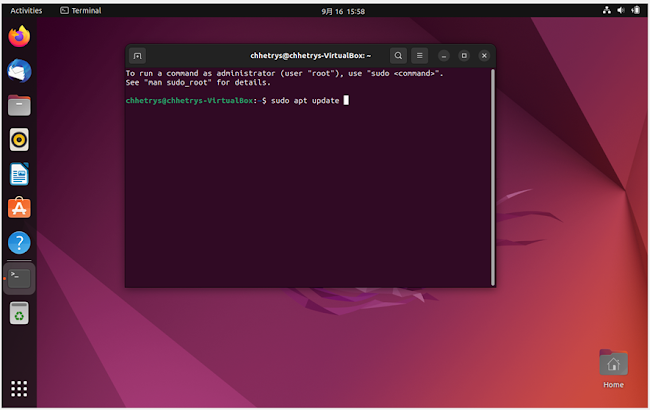
4.Updating

5.Install the apache Web Server

6.Install the PHP Extentions

7.Install Mariadb

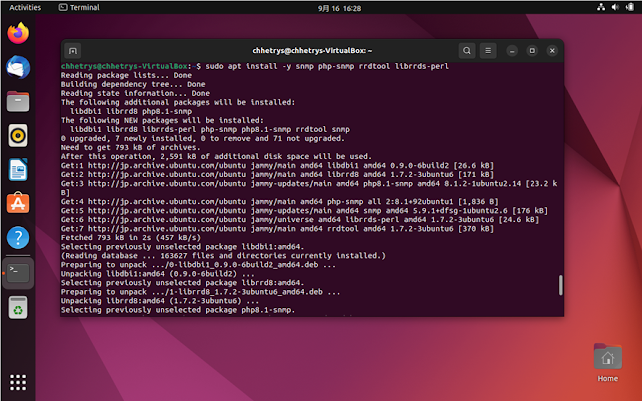
8.Install SNMP and rrdtool to monitor devices
9.Go to the .cnf file using the command

10.You can now edit the file

11.Add the below details

12.Save the configuration changes

13.After saving, Hit Enter


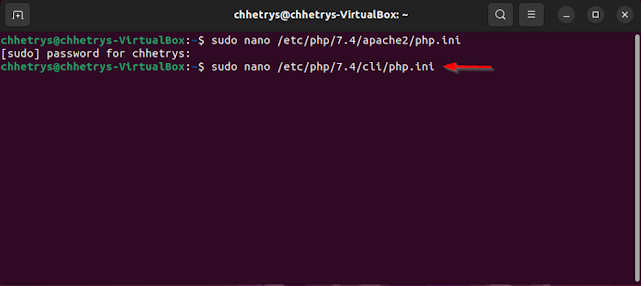
15.Go to the php.ini file using this command. You can check the php version and use the version on the command.Here in this example I am using PHP version 7.4 lets see what happens.

16.If you are able to edit the file then its ok if you are not able to edit and face this type of error . You can follow various methods and the below method worked for me.

17.Add this to the repository

18.Now, Install the php

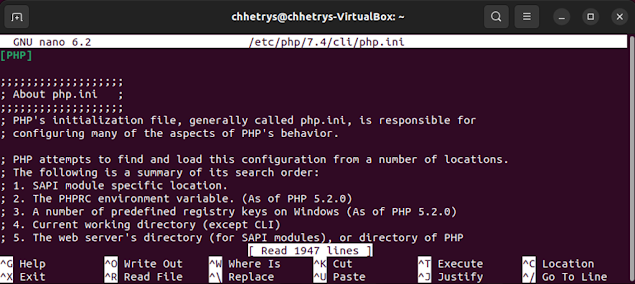
19.Now you are able to edit the file. For the better performance you need to add and update the settings like date.timezone, memory_limit etc.

20.Search for date.timezone

21.Go to the date.time

22.Remove this ";" and update the date.timezone

23.Search for memory_limit

24.By default you may see the memory_limit like this.

25.Update the memory limit

26.Now search max_execution_time

27.By default the time may be 30

28.Change the time to 60

29.Now save the file

30.Hit enter

31.Now again you need to go to the another location of php.ini and change as above
32.You are now on edit mode
33.Here also, search for date.time

34.Add the date.timezone

35.Search memore_limit

36.Change the memory limit to 512

37.Again search for max_execution-time

38.Set the time to 60

39.Now save
40.Now click enter

41.You will now reach to this step

42.Now, you need to create the database, provide the password and login to the database server

43.Now, create the database for the cacti installation

44.Create the database user and grant permission to the newly created database

45.Flush privileges

46.Now Exit

47.Similar to step 42,43,44,45,46 follow the below method
48.sudo mysql -u root -p mysql < /usr/share/mysql/mysql_test_data_timezone.sql
49.sudo mysql -u root -p
50.GRANT SELECT ON mysql.time_zone_name TO cacti@localhost;
51.flush privileges;
52.exit
53.Download the latest verion of cacti

48.Extract the Cacti

49.Move the extracted file to /opt directory

50.Import the default cacti database to the newly created cacti database

51.Edit the cacti configuration

52.Change the databasename, hostname etc as per your requirement

53.Save the configuration

55.Now, create the corn.d file to schedule the pooling job

56.Add the following scheduler entry to the corn.d file so that the cacti can pull every minutes that is assigned in the database retires.

57.Create the new site for the cacti tool

58.Use the below configuration


60.Restart the apache service

61.Create a log file for cacti and allow the apche user to write a data on to the cacti directory

62.visit the url to to begin the installation of the cacti
