M365 Admin Training Day 2-Account-Setup

Prior to Account Setup let’s know something:

Looking on to the specifications, you can select the right plan that completes your requirement.Below are the plans provided with their respective link:

-Personal and Family

-Business

-Enterprise

-Education

Ref links:

https://www.microsoft.com/en-ww/microsoft-365/buy/compare-all-microsoft-365-products?tab=1&market=np

https://www.microsoft.com/en-ww/microsoft-365/business/compare-all-microsoft-365-business-products?market=np

https://www.microsoft.com/en-ww/microsoft-365/compare-microsoft-365-enterprise-plans

https://www.microsoft.com/en-us/education/products/microsoft-365

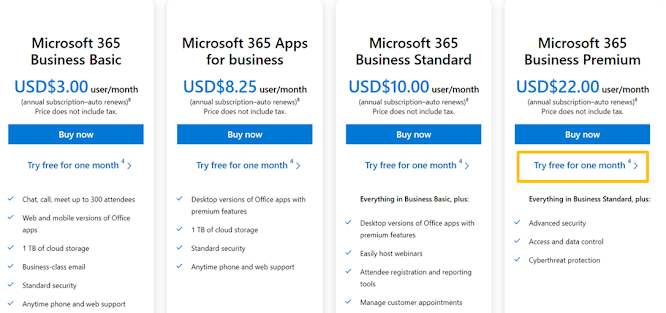
Based on the plans you select the pricing, and the features varies. For example, comparing Microsoft Business Basic License and Microsoft Business Standard, the Business Basic License user are limited to web-based office applications whereas Business Standard License users are privileged with desktop versions of office apps with premium features.

Account Setup

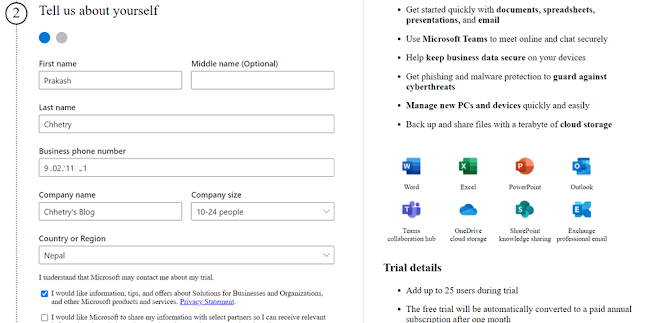
To register to my demo tenant, I have used temp-mail.org and created the temporary email address.In your case you can use your own email address to register eg:abc@hotmail.com

Use below link for registration:

https://www.microsoft.com/en-ww/microsoft-365/business/compare-all-microsoft-365-business-products?=&activetab=tab%3Aprimaryr2&rtc=1&market=np

Let’s Get started...

1.Click on Try free for one Month

For this demo, I have selected Microsoft 365 Business Premium (Choose Any)


2. Enter the email address

3.Click on Setup Account

4.Fill all the mandatory fields and click on next


5.You are required to provide the Phone Number details and Verify it.

6.Type username,domain name and password and click Next   
    e.g.,admin@chhetrysblog.onmicrosoft.com

7.You are asked to provide the payment details.If you add, it will start to deduct the payment once the trial period end.For this demo tenant I am not going to add any payment methods.After the completion of Step-3. I cancelled the browser tab.

8.To login to the portal use the link: https://office.com OR https://portal.office.com


9.Use the credentials that you used during the time of registration


10.You will see a pop-up showing "Yes" or "No". Click "Yes" if you dont want to see the pop-up in the next login


11.You are in. Well done !!!


Note: Once you login, open the next tab and use the below link and activate the Free Trial License 

OR

You can directly click the below link and start the registration following the above steps begining from step 1.


Previous Post Next Post

Ads.

Ads..